Showing posts with label DIY. Show all posts

Friday, June 15, 2012

DIY Lava Bead Bracelet


This bracelet was so easy and extremely inexpensive. I have nothing with a skull on it and don't really know how I feel about the trend altogether, so I decided to give it a shot. I picked up a strand of lava beads from Michaels for $3.59. The skull charm was found at Hobby Lobby for $1.99 (without their 40% off weekly coupon). I already had the clear stretchy string from a previous project as well as a package of gold spacers. With all of my supplies in hand, I got to work...


Ahhh, the juxtaposition of the shiny gold rings beside those lava beads…


I removed the charm loops on top of the skull, drilled a hole through it and spray painted it black so that it'd blend in with the lava beads. I only had a satin finish spray on hand, but if you used a flat finish, that little guy would be even more inconspicuous. (OR if you're totally on board with the trend, you could spray him gold.) Lastly, I knotted the string and added a dab of super glue to keep that sucker together.


I think this bracelet adds the perfect amount of edge to my arm party, what do you think?

I've got to give my hubby credit here. He found the lava beads and made himself a bracelet first. His is just the beads (no spacers or skull). I'm so glad he cares about style just as much as I do. We are a match made when it comes to this stuff. 


For about $5 you can't beat it. Plus, if dad is trendy, it's a great last minute Father's Day gift idea that the kids can make… easy as 1, 2, 3.

Thursday, April 19, 2012

Pink + Gray + White | Baby Shower

Months ago, I threw a baby shower for a good friend of mine that was expecting a sweet baby girl. I completely forgot to share the promised photos with y'all. Better late than never, right?
 It was such a cute shower, and Eileen and I had so much fun throwing it! Hope you liked the little peek at the party.

Eileen, you should be next ;)

Wednesday, April 18, 2012

Diggin' It

This wallpaper...

This dress...

This console...

P.S. Go see my guest post over at Along Came Splendor, where I share about my Ikea hack nightstands.

Tuesday, April 17, 2012

Color My World: Week 3

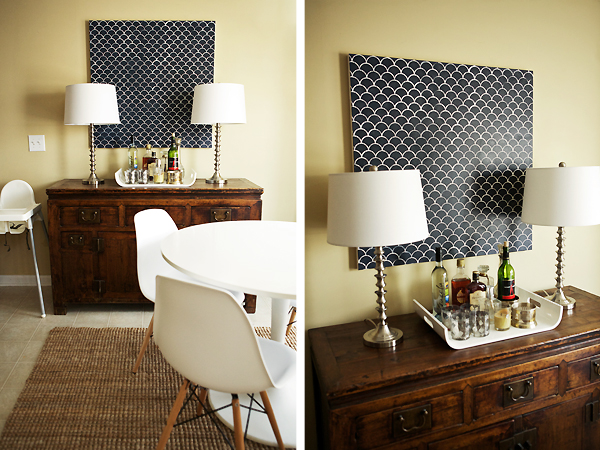
This week, I took on the challenge to paint something navy and found Benjamin Moore's Hale Navy to be the perfect shade.

Remember when I asked y'all which stencil to get from Royal Design Studio?


Well, I chose the Moroccan Scallops, of course. I painted a square canvas in our breakfast area. Now, I am in love with the stencil, but my project isn't perfect so don't look too closely. I would recommend not using the stencil on canvas. Because of the natural texture and flex of a canvas, I was left with some bleeding paint.

I can't wait to use the stencil again though. I think I'll use the stencil on a wall -- maybe a stripe about 4 feet wide of scallops from ceiling to floor. A gray/white combo would be subtle and would probably look great. Maybe behind Avery's crib and flipped upside down? The lines would be much more crisp on a wall, no doubt.

In the meantime… enjoying the navy addition to our breakfast nook. This is fast becoming one of my favorite spaces in our home! What do you think?


Who knows… there may just be a stencil giveaway in the near future. Hint, hint! ;)
And once again, be sure to check out the others taking on the challenge with me!

Tuesday, March 27, 2012

diy ombre tee

Love this...


Make this...

Tuesday, March 6, 2012

I SPY DIY

You're welcome.


Sunday, January 29, 2012

DIY paper garland

I received a few questions about how I made garland, so I thought I'd show y'all my step-by-step process.

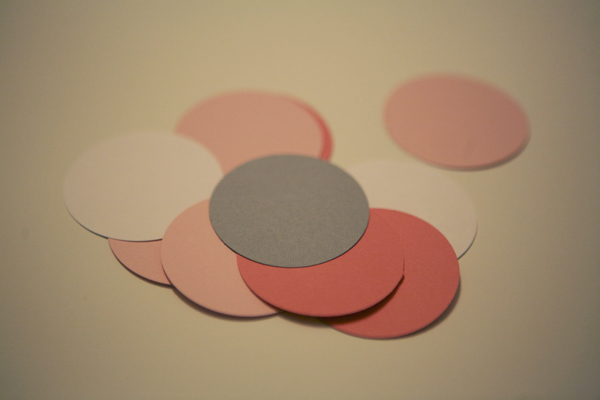
Step 1: You'll need card stock and a round hole punch (mine makes 2" circles). Punch out lots of circles in the colors that you wish to use.

Step 2: Line up the circles in the order that you want to sew them. I chose to go with a specific pattern, but if you're using more than 4 or 5 colors it may look better to have them randomly scattered with a more unexpected placement.

Step 3: Stack your circles in the same order you lined them up in.

Step 4: Feed the circles (one at a time) through your sewing machine so that you sew through the center of the circle. Each circle goes directly behind the other with edges touching but not overlapping. The machine will automatically feed the next circle through (as long as you keep the edges in contact with one another).

Step 5: Hang your garland and enjoy!

So easy, right? A very inexpensive way to decorating for the holidays or a special event. And what's even better is that you can save it and reuse time and time again. I hope this helped clear up any questions that you had about how I made my garland. If you have any other questions, feel free to email me.

Monday, January 16, 2012

Vintage Airline Tags


What a great idea Lisa Congdon had when she created her vintage airline tag art. You can buy it or turn this into a fun DIY for the world traveler. Such an efficient way to showcase your travels… just turn it into art! It's sure to become an interesting conversation piece. I just wish luggage tags these days looked as cool as these vintage ones, agree?

Wednesday, January 4, 2012

Free Printable Calendar

Are you all ready for the new year? This calendar is sure to help you keep your days straight. Not only is it useful, but it looks great. So, there's no shame in leaving this calendar out or even framed.


Love vs Design also has an array of free printables available on their site. Check them out here!

Saturday, December 31, 2011

Gorgeously Golden

Can't… get… enough.

Zig Zag Tray


Earrings

Pinned Image
Eames Chair

Pinned Image
Canvas Art


Glasses

Pinned Image
Chandelier

Pinned Image
Anthro Chair

Paper Mache Bowl White and Gold - The Mini
Paper Mache Bowl

Pinned Image
Stationary

And a little DIY for your New Year's festivities… amazing.


DIY Gold Leaf Nails

I've been using Ulta's High Roller for the past few weeks, but that DIY would take gold nails to the NEXT LEVEL! Happy new year, y'all. Hope you're enjoying lots of these:
See you next year!

Tuesday, December 20, 2011

Our Little Boy's Bedroom

Today, I'm sharing our 3-year-old's big boy room. It's practical and well-lived in! Nearly everything is a DIY project, thrifted, or Ikea, so you can get this room on any budget, really. 


Hudson's gallery wall is a compilation of DIY projects and art/prints framed in Ikea's ribba frames. The deer head is my favorite little project to-date! I found my tacky gold deer statue at a thrift store for $3 and worked a little magic on him. I made the cornice board myself… along with a little help from my handy husband. Still deciding whether or not to add an orange monogram to it?? 


Do you spy the campaign dresser? It has found a home, complete with a thrifted ($5) red lamp atop of it. The bedding is from Ikea. I was initally on the hunt for a seersucker duvet, but I settled on this navy and white striped one (without texture). I included this amazing rug in a roundup a few months back and had to have it. It's soft, forgiving and ultra durable. LOVE! I went with a smaller size rug because I plan on eventually having the boys share a room with 2 twin beds (not in this particular room). My thoughts have been to have the rug between the beds. Just wish there was wood instead of carpet… On another note, the headboard was bought at a yard sale for $5. I had painted it white, but when I saw a freakishly similar bedroom by Caitlin… I painted it navy. It looks so much better. But honestly, what are the chances that the gray walls, bedding AND rug would all be in another room?? Couldn't believe my eyes...


The dresser is Pottery Barn, but I found it at a moving sale, helping me save big. The antique fan and mirror were found at the Sleepy Poet, my favorite antique mall in Charlotte. The acrylic tray was thrifted ($0.50), and houses some of Hudson's favorite bedtime reads. The chair was thrifted ($3) as well. SURPRISE! :) And, lastly, the throw pillows on the bed and in the chair are a fun ink blot look. You really can't appreciate how pretty they are in the photos, but they are a great look for a great price! I found mine at a yard sale for $2. Score!


The ABC wall art was found at TJMaxx on clearance for $10. I snatched it up, knowing I'd find a place for it one day. The day has come, and it's a wonderful addition to our little guy's room. I found the toy box at Ross for $29.99. Can't beat that for a thick, woven basket! And here, you can see just how fun those pillows really are:


There you have it! Hudson loves his room, and so do we. Mission accomplished!

Sunday, December 11, 2011

diy garland & a winner

Saw this. Made this:


It really adds a fun little touch to our tree, AND it was cheap and easy… my kind of DIY! Next year, I'll try it with metallic or glitter card stock, but this will do for now. 

Plus, congrats to Heather from Pineapples and Pearls!! She's our winner from last week's giveaway!

Tune in tomorrow for another giveaway. Trust me - you won't want to miss it.